
SAFETY INSTRUCTIONS
Due to the potential hazards associated with any electrical instrument, it is important that the user is familiar with the instructions covering the capabilities and the operation of the instrument. The user should ensure that all reasonable safety precautions are followed and if any doubt, should seek professional advice before proceeding. The instrument is designed for use by suitably trained, competent personnel in a controlled working environment and is intended for use as a UV Accelerated Weathering Tester only. AHP PLASTIK MAKINA cannot be held responsible for any unauthorised modifications to this unit.
WARNING
This unit contains hazardous live voltages. Under no circumstances should the user try to prevent or restrict the movement of parts or gain access to the internal circuitry, either personally or with the aid of foreign bodies. All ventilation slots must be kept clear.
PROVISION FOR LIFTING AND CARRYING
When unpacking or moving this unit, extreme care is required, owing to its physical construction and weight.
It is recommended that accepted lifting and carrying procedures are employed and that personnel wear the appropriate protective equipment e.g. safety shoes.
If the unit is to be moved an appreciable distance/height, it is recommended that it is moved via a suitable vehicle e.g. a forklift truck.
OPERATING ENVIRONMENT
This unit is intended to be used in a residential, commercial, and light industrial environment as laid down in BS EN 50081-1 and BS EN 50082-1. The following list gives examples of locations in which the instrument might be located: workshops, laboratories, and service centers. Locations that are considered to be commercial or light industrial.
CLIMATIC ENVIRONMENT
The unit is intended to operate within the following conditions
i) Temp 25+/-5 deg Celsius
ii) Humidity 30-65% RH
iii) Altitude <2000m above sea level.
And it is intended to be stored in a temp range of –25 – +25 degrees Celsius.
INSTALLATION CATEGORY AND POLLUTION DEGREE
Installation category III
Pollution Degree 2
Safety instructions
1- Precautions
(A) Operation manual is available for the end users anytime and anywhere.
(B) Please read the operation manual carefully before use.
(C) All the instrument functions are described here, and anything other than the operation manual is not guaranteed.
(D) No edition, copy or use in part or all of this manual is allowed.
(E) A change in the manual content is permitted without prior notice or advance notice.
(F) Please contact the purchasing office or our company if there are any mistakes.
2. Precautions for product safety and modifications (changes)
2.1 Read the safety precautions (instructions) in this manual carefully in case of any damage to the system, maintenance, or the instrument.
2.2 We company, shall not be liable for any damage caused by failure to use, place, or comply with the contents of this manual.
2.3 Additional protective devices or safety circuits should be installed outside the production in case of any damage to the system, maintenance, or the instrument. It is strictly forbidden to alter (change) or add to the internal structure.
2.4 Do not disassemble, repair or refurbish without permission; otherwise, it may lead to electric shock, fire, or malfunction.
2.5 Please contact our sales department if the parts or consumables need to be replaced.
2.6 Keep the instrument from water in case of malfunction.
2.7 Avoid a crash as it may cause damage or malfunction.
3 Liability Waiver
3.1 We company only guarantees or assumes responsibility for those specified in the quality assurance conditions.
3.2 We company, shall not be liable for all direct or indirect damages (including those to Users or third parties when using the instrument) as a result of any defects or unpredictable
Installation
1 Application
This instrument has adopted the fluorescent UV lamp method, applicable to the exposure of light sources in various material test chambers, and is designed for the change of materials placed outdoors and formulation improvement of new materials, as well as durability testing.
2 Test Samples and Performance Evaluation
2.1 Appearance evaluation:
The instrument, employing a fluorescent UV lamp ideal for the UV segment of the sunlight spectrum, is able to simulate discoloration, decrease in brightness, and intensity of samples, supported by temperature control and humidity supply devices. With the real simulation of the environmental conditions of as cracking, flaking, chalking, oxidation and other damages to the sun (UV section) high temperature, high humidity, condensation, dark cycle, it is widely used to evaluate the weather resistance of materials by weakening the light or moisture resistance under the synergistic effect between UV light and moisture, or even make them fail. The instrument has the characteristics of the best sunlight UV simulation, low cost of use and maintenance, easy operation, and its process controller automatically runs the test cycle, with a high degree of automation, good stability of lighting, and high reproducibility of test results.
2.2 Evaluation of mechanical and other properties:
For general rubber materials, there are tensile strength, elongation, hardness measurement, plastic measurement of impact strength, elongation at break, tensile strength, and bending strength. If necessary, other performance tests can be specified.
3 Structure and Technical Performance
3.1 UV fluorescent lamp
A total of 8 UVA fluorescent UV lamps, 40W each, are used, suitable for performance comparison of various polymers and stabilizers, and they are also perfect for correlation studies, since UVA can accelerate tests and provide fast evaluation results, essential for QC and R&D applications and tests on strong and durable materials, accelerating tests and providing fast evaluation results.
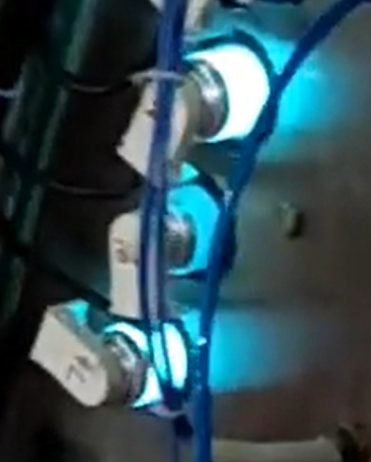
A. Installation: Fragile UV lamps should be packaged separately at the factory and be installed with special care. Before installation, please power off the instrument. Lift the test bin cover and both sides of the replacement port, insert the UV fluorescent lamp right into the seal, then push the lamp to insert the lamp right into the seal on the other side. In the end, adjust the sealing caps on both ends of the lamp before installing the power supply connector. Keep the lamp clean in case of any effect on its irradiance; otherwise, wipe it with alcohol. Store the backup lamps in a ventilated, dry, and non-corrosive environment.
B. Radiation preservation. A long-used fluorescent UV lamp will gradually decline in its output light. Consequently, the desired radiation effect fails to be achieved. Please replace the eight lamps to ensure good performance when the light energy radiation is too low (UV lamp ignites, amounting to 400 ~ 450h). Measurement of the light source energy will be done using a handheld UV radiometer
4 Temperature control system
(1) PLC and text display communication control, convenient and easy for operation.
(2) A/D control module for PID temperature and humidity regulation, accurate in temperature (humidity) control. Multi-point fault and information display facilitate troubleshooting checks.
5 Humidification system
The humidification system, consisting of a water tank and, humidifying system, enables the sample’s exposed surface to be dewy and wet in accordance with the humidity condensation mechanism, to simulate the perfect testing environmental conditions of rain, high humidity, condensation, and with the sun (UV) dark synergy.
6 Protection System
The instrument is protected from water shortage, over-temperature, short circuit, and overload. All these protection systems are located in the electric control panel and cabinet, respectively. The water tank has a level switch for the inlet water and guarantees that water to always in the tank.
7 Technical parameters
7.1 External dimensions: 1410*910*1560mm (W*D*H)
7.2 Temperature range:RT+10℃~65℃
7.3 Temperature uniformity:±3℃
7.4 Temperature fluctuation:±2℃7.4 Humidity range:≥75%RH
7.5 Center distance inside the lamp: 65~75mm
7.6 Distance between the test article and the center of the lamp:55 mm
7.7 Wave length: UVA
7.8 Irradiation intensity: As per lamp specification
7.9 Light, humidity, temperature (adjustable)
7.10 ◎Inner material: SUS304 stainless steel plate
◎Shell material: Steel with power-coated paint
7.11 Lamp: UVA lamp, a row of 4, 40W / only (8 pcs) (Actinic BL TL(-K) /TL-D(-K) Philips as default lamps)
7.12 Water source and consumption: clean or distilled water 8 L/ day (Self-provided)
7.13 Control system: USB port and WINDOWS software are included
8 Water Quality
For a UV test chamber (UV weathering / UV aging chamber), the quality of water is critical because it directly affects lamp life, irradiance stability, spray systems, and test repeatability. Most standards are very specific about this.
Below is a practical and standards-aligned guide.
8.1 Recommended Water Quality (General Requirement)
Use: Deionized (DI) or Distilled Water
Tap water is not acceptable.
8.2 Water Quality Specifications
| Parameter | Recommended Value |
|---|---|
| Conductivity | ≤ 5 µS/cm (some standards allow ≤ 10 µS/cm) |
| Resistivity | ≥ 200 kΩ·cm |
| Total Dissolved Solids (TDS) | ≤ 5 ppm |
| pH | 6.0 – 8.0 |
| Hardness (CaCO₃) | 0 ppm |
| Silica (SiO₂) | ≤ 0.1 ppm |
| Iron (Fe) | ≤ 0.01 ppm |
| Chlorides | ≤ 0.1 ppm |
| Organic matter | Very low / none |
8.3 Requirements from Major Standards
ASTM G154 / ASTM G155
- Requires deionized water
- Conductivity typically ≤ 5 µS/cm
- No visible residue after evaporation
ISO 4892-3 / ISO 4892-2
- Water must be demineralized
- Free of salts, metals, and particles
- Prevents spotting on specimens
SAE J2020 / SAE J2412
- DI water only
- Strict control of minerals to avoid lamp contamination
8.4 Why Tap or RO Water Alone Is Not Enough
| Problem | Cause |
|---|---|
| White spots on samples | Calcium / magnesium |
| Reduced UV output | Mineral coating on lamp |
| Nozzle clogging | Sediments |
| Inconsistent test results | Water chemistry variation |
| Short lamp life | Mineral & silica deposition |
RO water alone often still has:
- Silica
- Sodium
- Residual hardness
RO + DI polishing is acceptable.
Best Practical Setup (Recommended)
- RO system (pre-filtration)
- Mixed-bed DI resin
- Inline conductivity meter
- Final filter (1–5 µm)
This ensures long-term stability.
If You Want to Verify Your Water
Simple checks:
- Handheld conductivity meter
- Evaporation test (no residue on glass)
- Periodic lab analysis (recommended annually)
8.5 Summary
✔ Use DI or distilled water only
✔ Conductivity ≤ 5 µS/cm
✔ Zero hardness & minimal silica
❌ Never use tap water
❌ RO alone is risky
9 Usage environment
Temperature:20~35℃
Humidity:50-70 %RH
Atmosphere: 86~106 kPa
No strong vibration in the surroundings.
No direct sunlight or other heat source radiation;
No strong airflow. No airflow is blown directly to the box when the surrounding air needs to be forced to flow
No strong EMF influence;
No high concentration of dust and corrosive substances.
In addition to horizontal placement, reserve 1000mm space between the instrument and the wall or object for operation and maintenance, ventilation
10 Attention
Safety precautions
- Human eyes and skin are often exposed to ultraviolet light, eyes and skin will be burned. And high-concentration ozone generated when the UV lamp is lit will cause headache, chest
tightness and other discomfort. in order to prevent the above phenomena, the site should be kept ventilated, and protective equipment should be worn. - To ensure the safety of the equipment, please install the external protection mechanism and supply power according to the product nameplate to ensure the instrument
safe. - Flammable, explosive, toxic, strong corrosive substances is strictly prohibitedfor thetest.
- Non-specialists are not allowed to disassemble and repair.
- The instrument should be reliably grounded. Please replace the parts with thesametype and specification if there are any malfunction.
- Never open the test bin door during the test.
- Read the manual in detail before operation.
Precautions for use
1.It is normal that the water shortage protection doesn’t work due to the lack of water in the tank as the instrument starts working the first time. Please fill up water tank
2.Do not open the door when the instrument is performing PID calculations in case of any calculation errors. (The calculation has been done before leaving the factory)
4. Do not modify the parameters of the regulator, etc., except for those allowed to be changed in the manual.
11 Compressed Air, Power, Water Inlet and Drain Connections
Place the machine on a robust surface and adjust the legs to level the machine on the ground.
On the right side of the machine, check connections for compressed air inlet, water inlet hose connection and drain line. Compressed air pressure needs to be less than 4 bar.
The main power of the machine is single-phase, 220V-50Hz (Maximum 10 KW). Don’t forget to connect the ground connection of the main power for the safety of the operator.
12 Software Operation and Setting
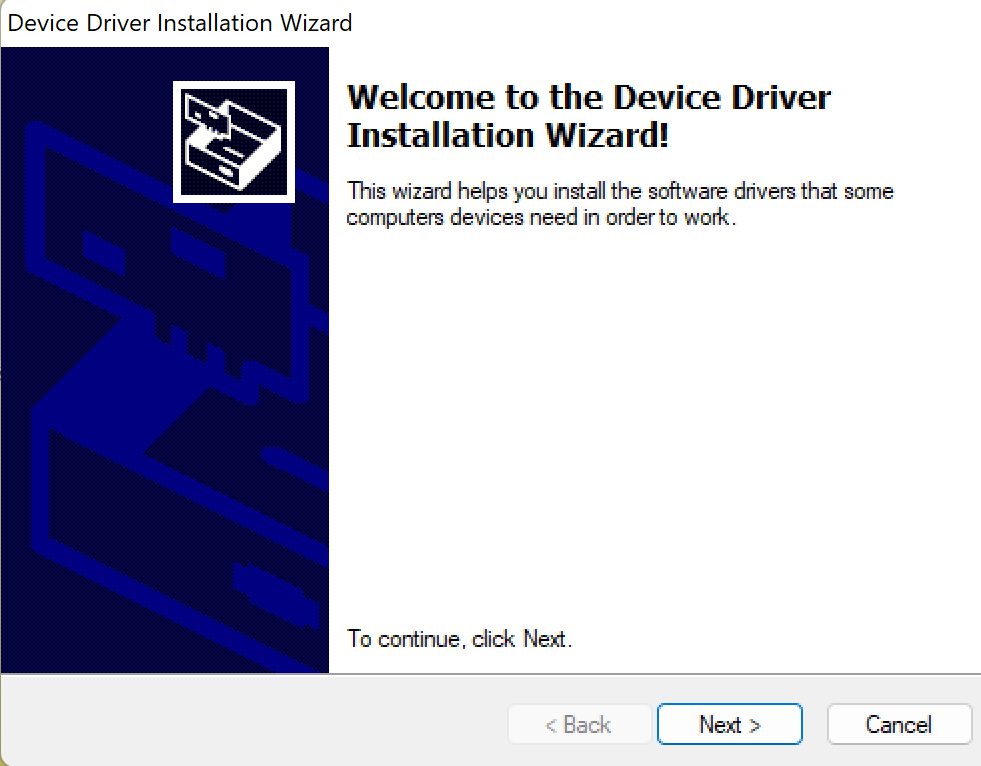
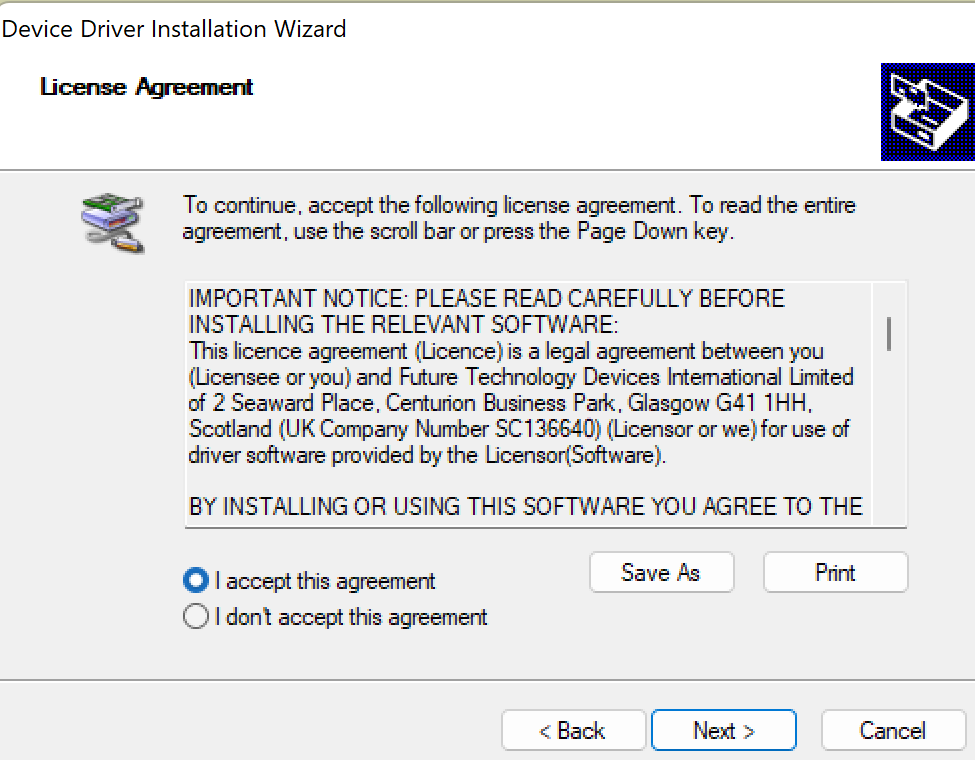
Install RS485-USB Drive for AHP’s Products
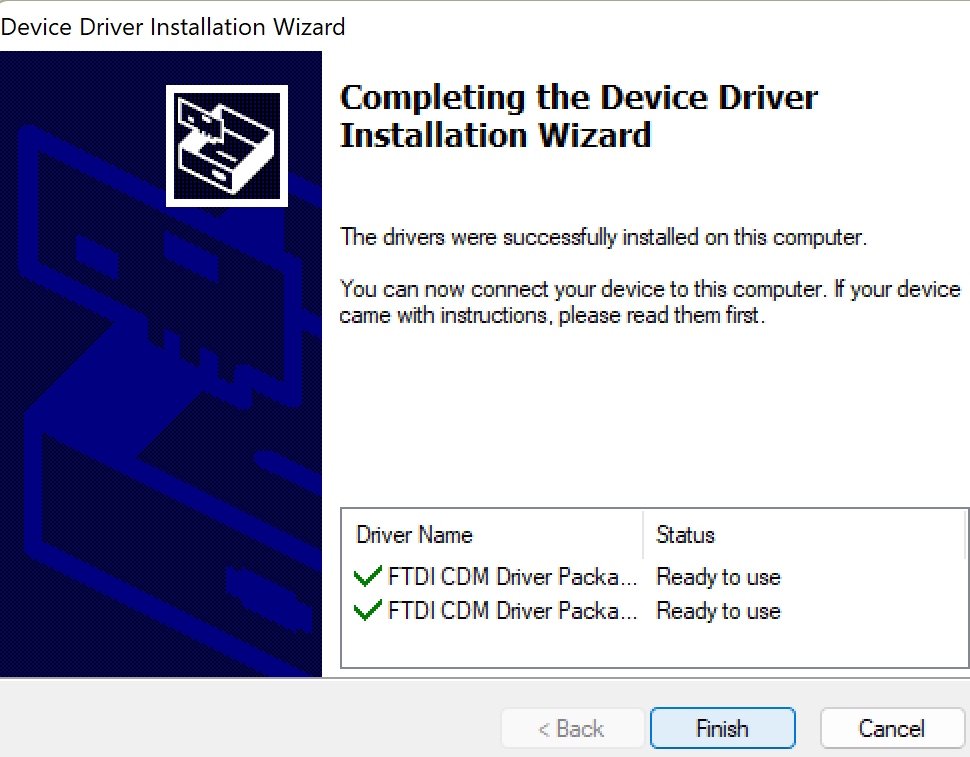
1- First download driver from below link
2- Run the file as administrator

3- Extract file

4- Click Next
5- Accept agreement
6- At the end click Finish
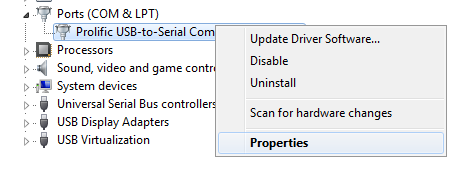
7- After installation, refer to (Device Manager/Ports) from control panel of Windows and check if you have virtual COM port
8- All AHP’s computerized products have COM port number in settings page that need to be conforming to the COM port number in device manager
9- You can easily set the COM port number as below:

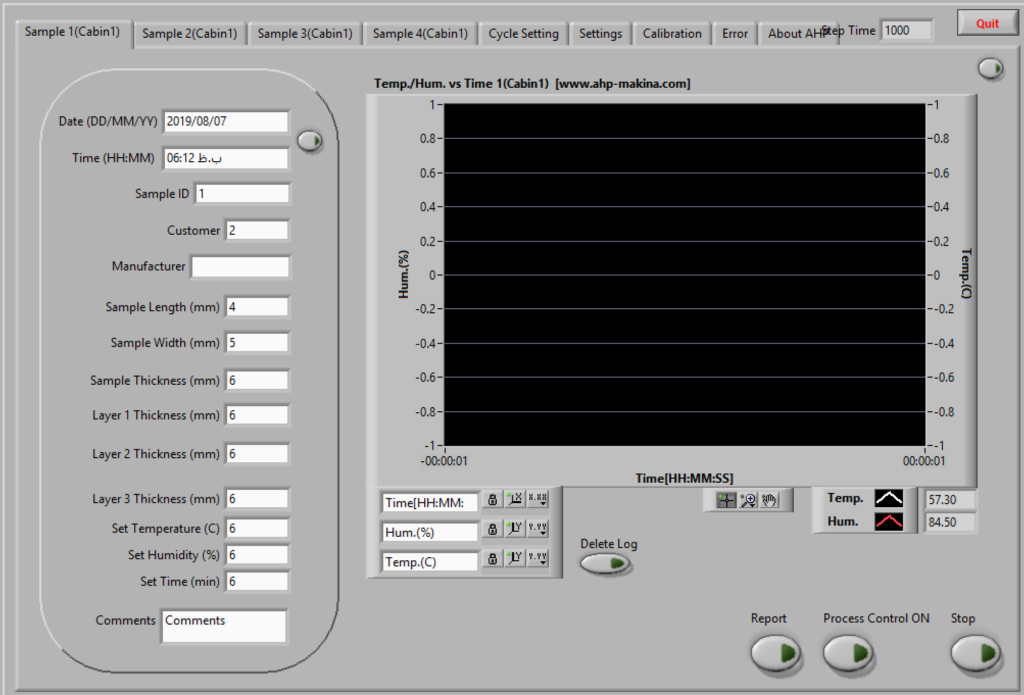
After installation of the driver, you need to install the software itself. The software comes to you on a flash disk. Install the software with no change in the root of installation. On the front panel of the software, you have 4 sample settings pages. It allows you to set up four different groups of samples that you place inside the test chamber. As depicted in the picture below, you can input general sample settings on left side of this page. Then, to start recording the data of temperature and humidity, click on “Process Control ON”. Any time you want to stop recording, you can click on “Stop”.
Before starting to record, you can click “on “delete log” to clear old data on “Delete Log” to clear old data from the graph. After the test finishes, you can click on “Report” to obtain the MS Word report. To have the report, you need to have MS WORD installed on the computer.
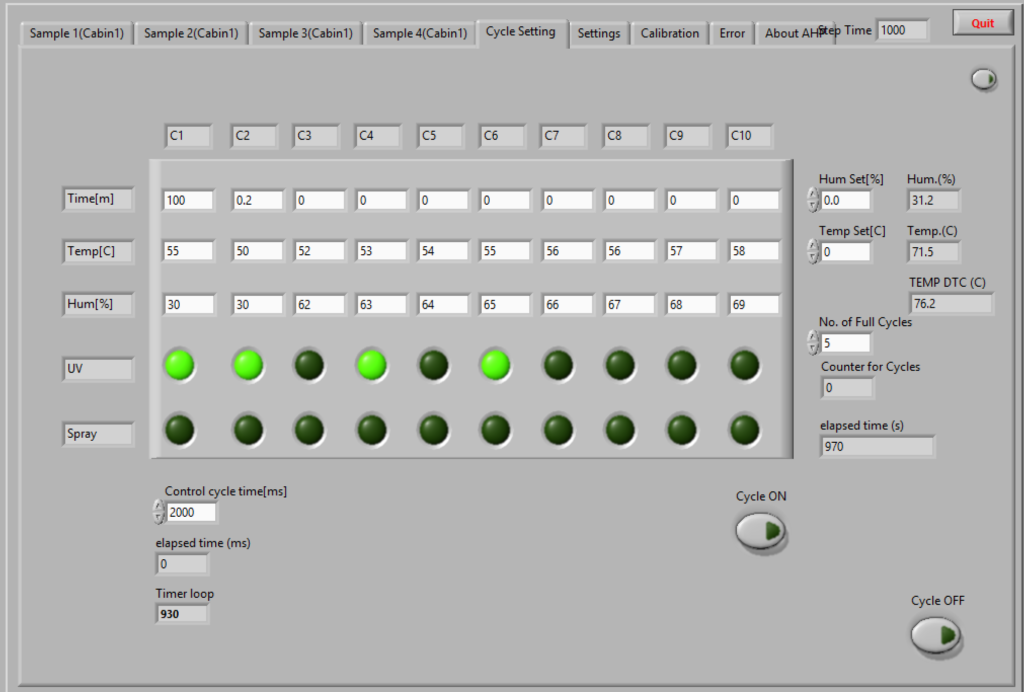
On this page, you can set the cycle of the test. Time, Temperature, Humidity, and UV lamps can be set on this page. Spray function is an option, and you need to order it in case of need. Also, you can set the total number of cycles for testing.
After you set all the above parameters for each cycle and the total number of cycles, now click on “Cycle ON”. Any time you can stop working by clicking on “Cycle Off”.
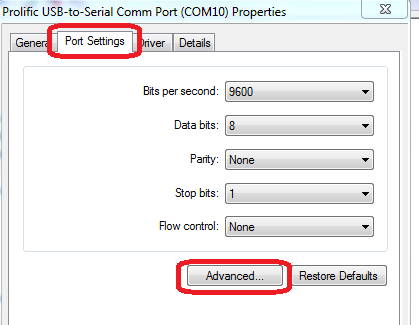
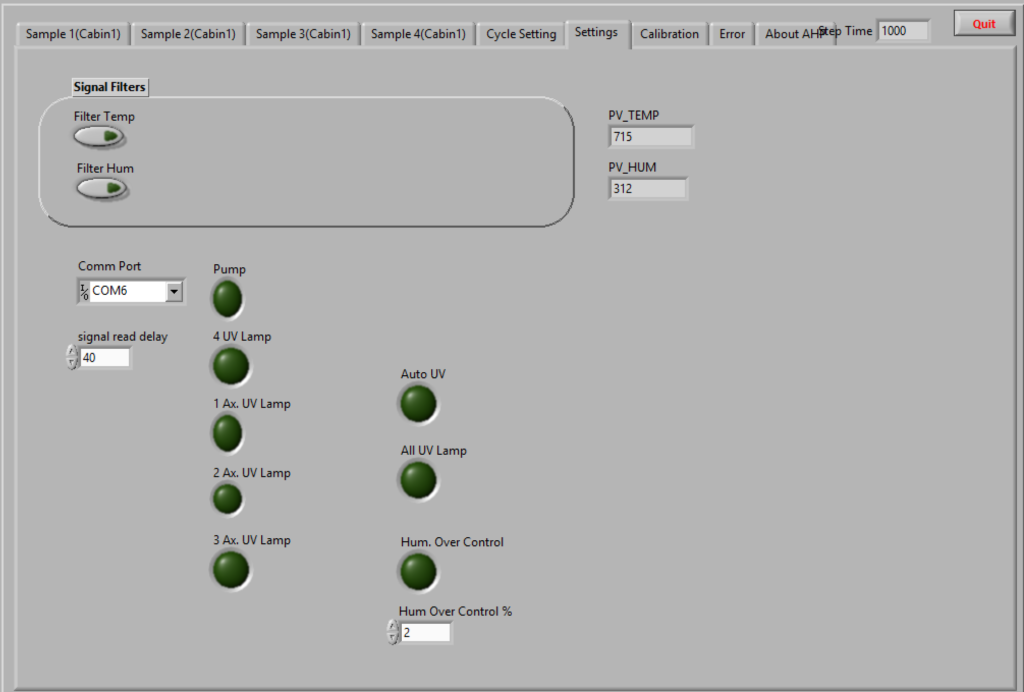
On the settings page, you have the communication port number. After you install the RS483 communication driver, you will have the “COM PORT” in the device manager of WINDOWS. You need to set the same number for that port as the number of the port that is shown here.
“Hum Over Control %” is the deviation control parameter of the humidity of the machine.
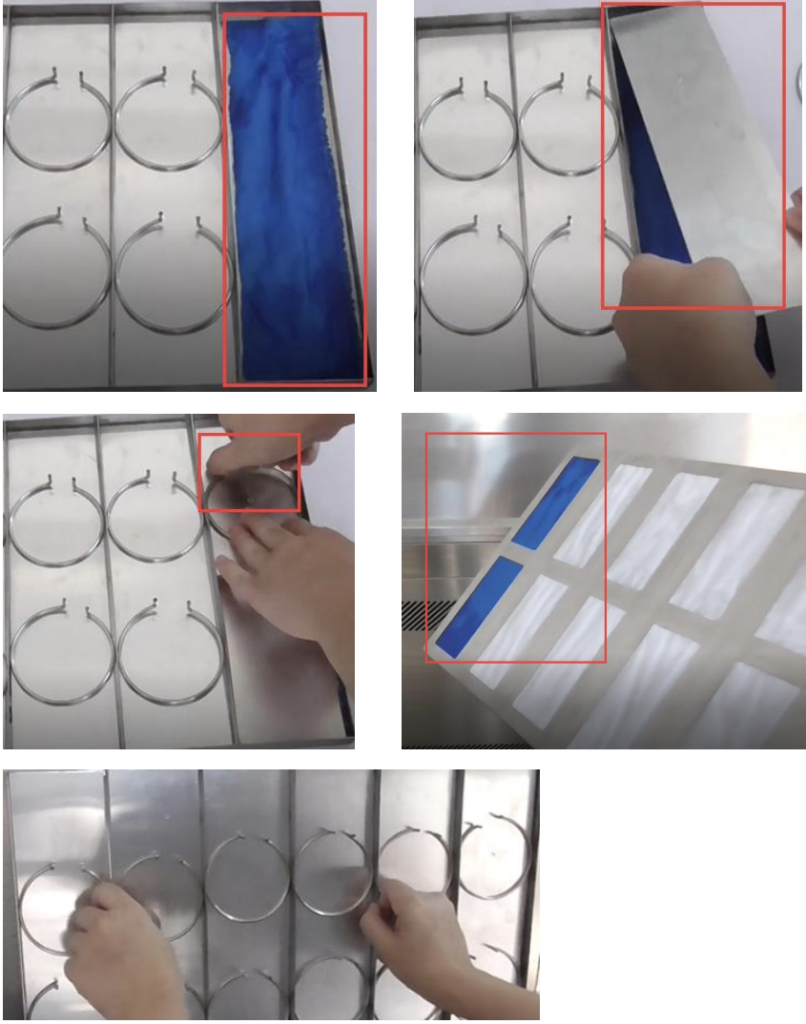
13 Sample Placement on Sample Holder
Take out sample holder
Install sample
14 Replacement of Lamps or Taking Them Out for Cleaning of the Chamber
for cleaning inside the chamber, or replacement of the lamps:
Turn off the machine and turn off the main power switch. Open the side doors of the machine on both sides. detach the connector of the lamp gently on both sides. Slowly slide the lamp to one side with care not to break it. You can easily take the lamp out. Now you have access to the inside of the chamber for cleaning. If you don’t have the water quality as mentioned in earlier sections, it will cause rust on the surfaces of the chamber. You can clean them out using proper Scotch Brite or any rust cleaning detergent in reach.