3 Apparatus
3.1 General
Theapparatus shall consist of a jig or any other arrangement capable of:
a)applying the specified diametric and/or angular deflection;
b)applying the specified test pressure(s), positive or negative;
c)maintaining the test assembly in the required position throughout the test;
d)resisting the forces resulting from the mass of the water in the test assembly and from the applied hydrostatic test pressure(s) during the test period.
The apparatus shall not otherwise support the joint against the internal test pressure.
3.2 Apparatus
The apparatus shall include the following items which all shall be capable of resisting the forces and pressures generated during the test.
3.2.1 End sealing devices, having a size and using a sealing method appropriate to seal the non-jointed ends of the test assembly. The devices shall be restrained in a manner that does not exert longitudinal forces on the joint at positive pressures;
3.2.2 Hydrostatic pressure source, connected to one of the sealing devices, or to the test piece, and capable of applying and maintaining the specified pressure [see items f) and g) of 6.1];
3.2.3 Negative air pressure source, connected to one of the sealing devices, or to the test piece, and capable of applying and maintaining the specified internal negative air pressure for the specified time. See item d) of 6.1;
3.2.4 Arrangement, capable of venting air from the assembly;
3.2.5 Pressure measuring devices, capable of checking conformity to the specified test pressure (see item d), f) and g) of 6.1).
When testing with diametric deflection is required the following items shall also be included:
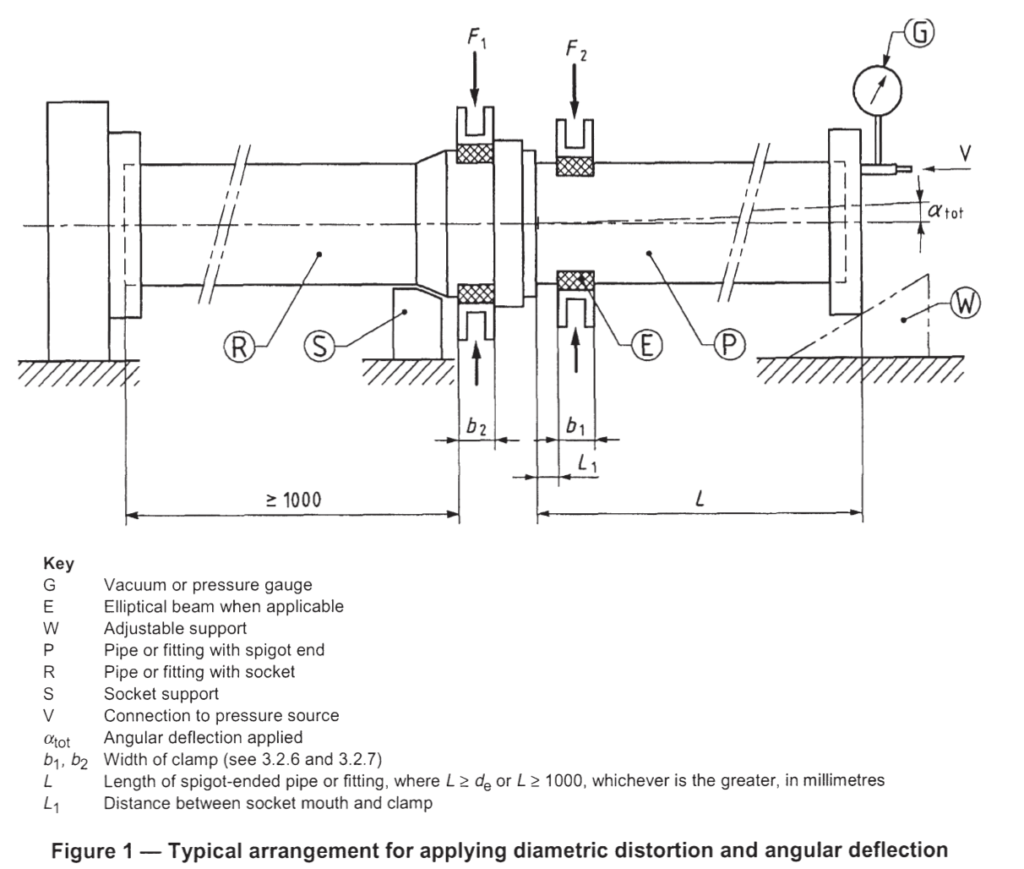
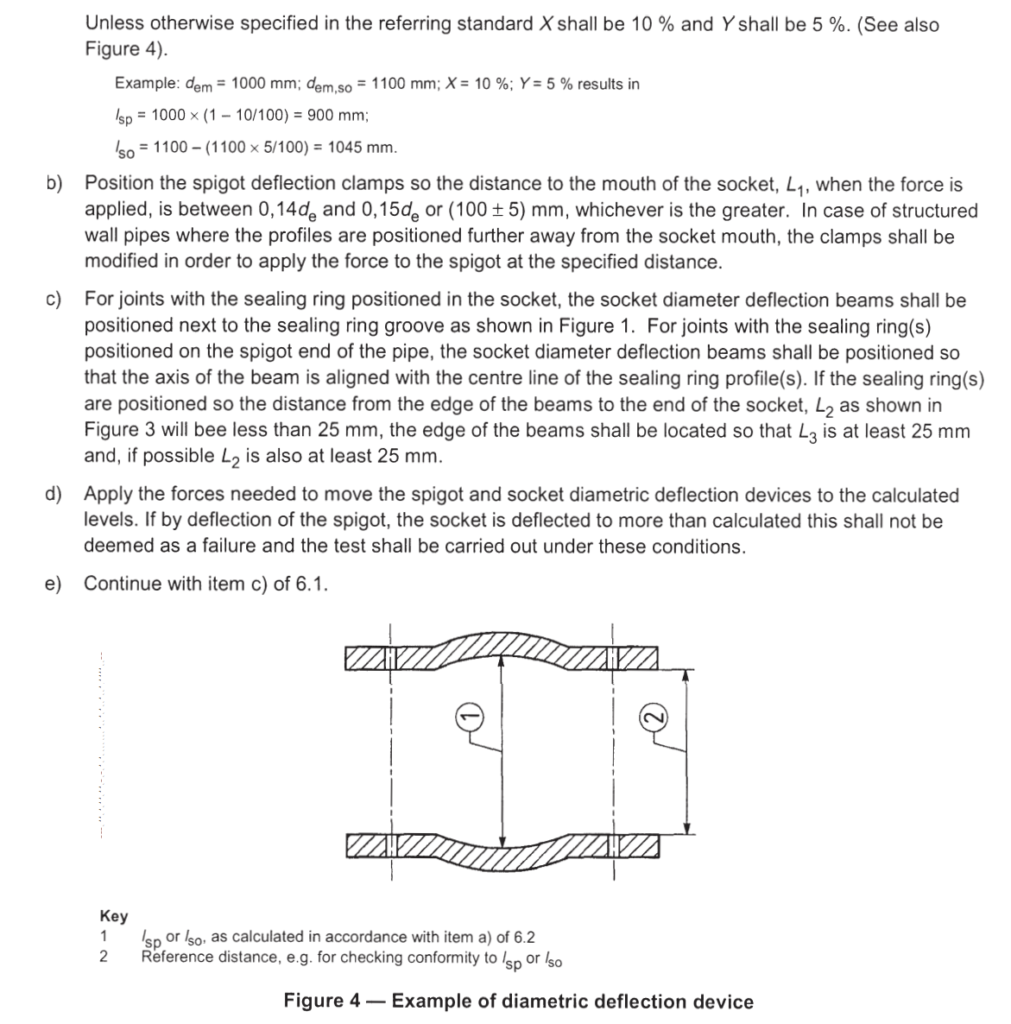
3.2.6 Mechanical or hydraulic device, capable of applying the necessary diametric deflection to the spigot [see item b) of 6.1] and acting on a beam which is free to move in the vertical plane square to the axis of the pipe. For pipes with a diameter equal to or greater than 400 mm, each beam can be elliptically shaped to suit the expected shape of the pipe when deflected as required, see Figure 4. The length of the beam or the curved part of the beam shall be greater than the contact area with the deflected spigot.
The width, b1, see Figure 1, shall depend upon the external diameter, d,, of the pipe as follows:
— b1 = 100 mm for d, < 710 mm;
— b1 = 150 mm for 710 mm ” d, < 1000 mm;
— t’j = 200 mm for d, ” 1000 mm.
3.2.7 Mechanical or hydraulic device, capable of applying the necessary diametric deflection to the socket [see item b) of 6.1] and acting on a beam which is free to move in the vertical plane square to the axis of the socket.
The length of the beam or the curved part of the beam shall be greater than the contact area with the deflected socket.
For pipes with a diameter equal to or greater than 400 mm, each beam may be ehiptically shaped to suit the expected shape of the socket when deflected as required, see Figure 4;
The width, b2, shall depend upon the external diameter, d,, of the pipe as follows:
— b2 = 30 mm for d, < 110 mm;
— b2 = 40 mm for 110 mm ” d, < 315 mm;
— b2 = 60 mm for d, ” 315 mm.
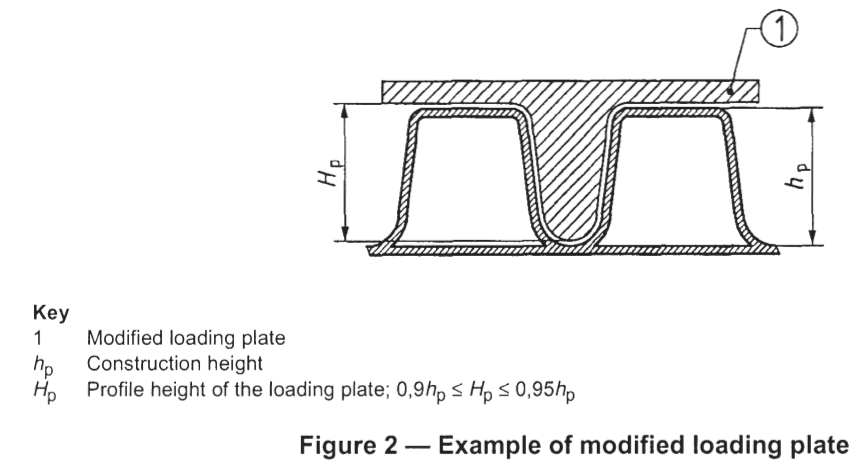
When there is a risk that the stiffening elements (profiles) of a structured wall pipe or socket will deflect more than 0,1 times the profile height, the clamps shall be modified so they will come into contact with the pipe wall between the profiles when the profile is deflected to between 0,9 times and 0,95 times the profile height, (see Figure 2).
Such modifications shall be made from wood or less flexible materials.
4 Test pieces
The test piece shall comprise an assembly of (a) pipe section(s) and/or fitting(s) including at least one
elastomeric sealing ring joint.
The joint to be tested shall be assembled in accordance with the manufacturer’s instructions where available. The length of the test pieces in pipe form shall be as specified in Figure 1.
The same test assembly shall be used for the entire specified test regime.
NOTE To reduce the volume of water needed a sealed pipe or mandrel can be located within the test piece provided it is 100 % tight to the test pressures applied, and it is not of a shape that njay provide support against possible deformation during the test.
When a fitting or any other ancillary component is to be tested, the appropriate end of the test piece shown in Figure 1 is to be replaced by that component.
The component is fixed to the test rig and plugged in its open end(s) as appropriate for its design.
6 Procedure
6.1 General
Carry out the following procedures at the specified temperatures.
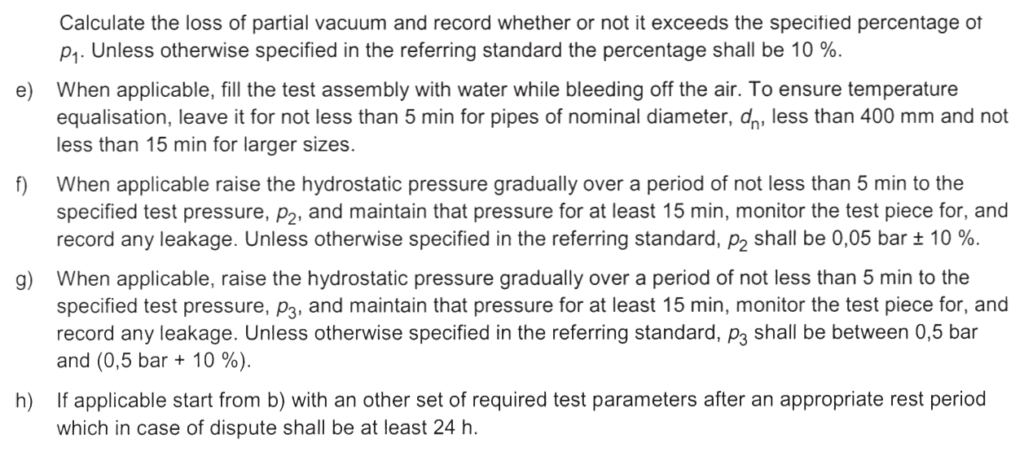
a)Mount the test piece wIth sealed ends in the apparatus;
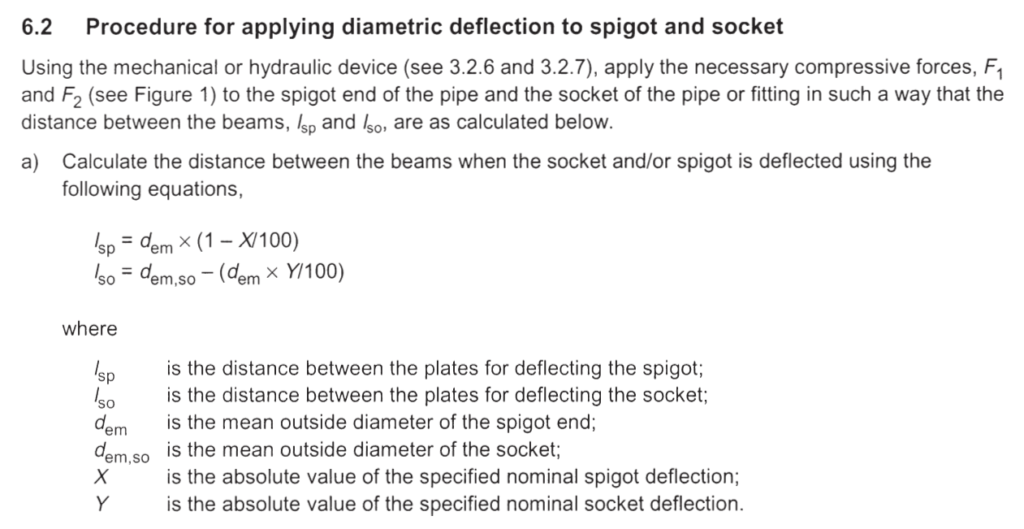
b) When applicable, apply the specified movement of the loading beams for diametric deflection of the spigot and/or socket end(s) as described in 6.2
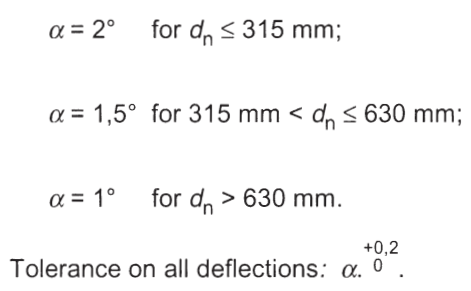
C)When applicable, apply the specified angular deflection to the joint. Unless otherwise specified in the referring standard the applied angular deflection, a, shall be as follows:


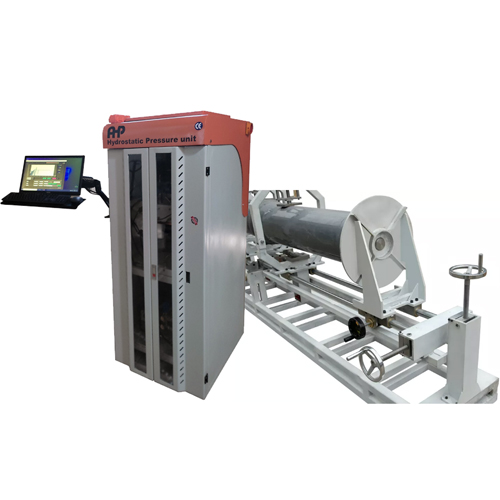
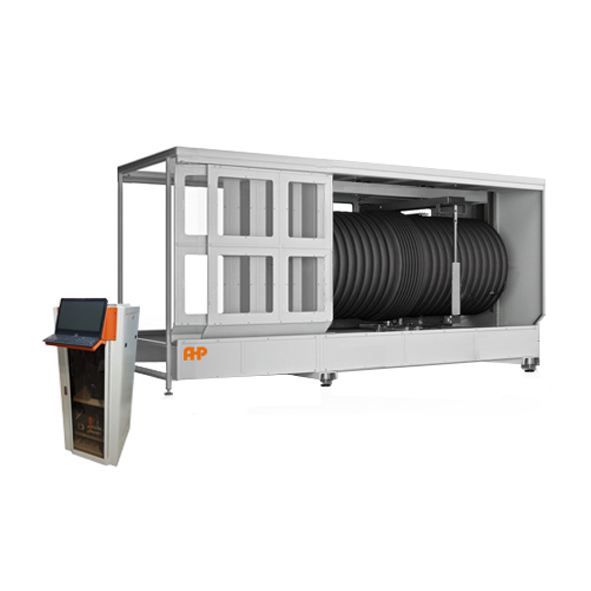
Leak Tightness Tester for PVC Pipes up to 250mm-BS EN 1277
- According to BS EN 1277 //
- Structure for applying diametric deflection //
- Capable of applying angular deflection up to 2.5 degrees //
- Structure is suitable for testing PVC pipes up to 250mm //
- Pressure unit including both positive and negative pressure //
- Negative pressure range is 0~(-0.06)MPa //
- Positive pressure range is 0.005 – 0.1MPa //
- Water fill system to the sample piece //
- Positive and negative pressure accuracies according to EN 1277 //
- Digital radial deformation indicator //
- Radial deformation indicator resolution 0.01mm //
- Test stand including computer and software //
- Software is Windows-based //
- Online support for the software //
- Automatic cycle for the test //
- PLC based control //
- Manual deflection application to the defined positions on the length of the pipe //
- Easy change of place of force application //
- Seal end caps will be quoted separately as the customer need //
- Report in MS-WORD

