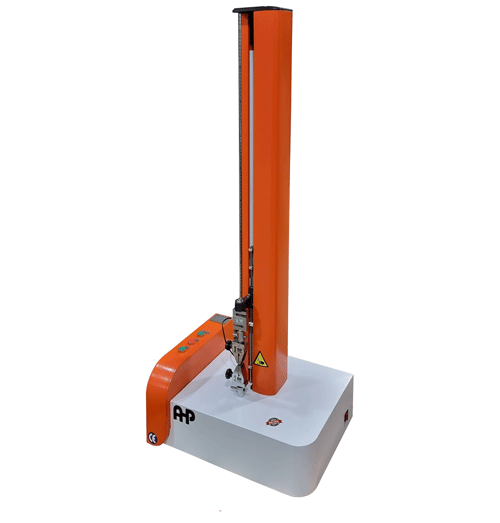
6 Apparatus
6.1 Tensile Testing Machine, with a reversible chart, complying with the requirements listed for Method A of Test Methods D882 with grips satisfactory for the purpose. Refer to section on grips in Test Methods D882.
6.2 Specimen Cutter, capable of producing nick-free 1±0.001 in. (25.4±0.03 mm) testing strips, with a precision of 1 ± 0.001 in. (25.4 ± 0.03 mm).
6.3 Micrometer, capable of measuring the thickness of specimens to 0.001 in. (0.03 mm) as described in 8.9.1.1 of Specification D2103.
8 Specimen Preparation
8.1 Cut five strips parallel to the machine direction that are 1.0 in. (25.4 mm) wide and long enough to provide for an initial grip separation of 5 in. (127 mm).
8.2 Measure the thickness of each specimen at five equally spaced points in the area that will be between the grips to the nearest 0.001 in. (0.003 mm) and record the values.
9 Preparation of Apparatus
9.1 Select a load range so that the scans cover approximately two-thirds of the chart width.
9.2 Calibrate the strain gage as directed by the manufacturer of the machine. Set the rate of grip separation at 5 in./min (127 mm/min) and the initial grip separation at 5 in. (127 mm).
11 Procedure
11.1 Clamp the first specimen in the grips so that it is free to slack but is not under tension.
11.2 Start the testing machine and chart, and elongate the specimen at 5 in./min (127 mm/min) to an extension of 15, 50, 100, 150 or 200 % and stop the testing machine and chart. (In Fig. 1, at extension AE, curve AB is generated.)
11.3 Wait 60 s or 24 h, during which time the specimen will relax. See Note 1. (In Fig. 1, extension BG is generated.)
NOTE 1—Slack in the specimen and misalignment of the grips are the major causes of non-linearity of the early part of the load-extension curves.
11.3.1 When testing materials of unknown response, investigate a series of times for recovery.
11.4 Return the crosshead to the original grip separation, simultaneously reversing the chart. (In Fig. 1, curve GCA is generated.)
11.5 Wait 180 s.
11.6 Re-elongate the specimen to the same extension as used originally in 11.2. (In Fig. 1, curve ADX is generated.)
11.7 Repeat the procedure described in 11.1-11.6 on the other four specimens.
12 Calculation (See Fig. 1)
12.1 Determine the length of AD and AE in chart units. Calculate the permanent deformation in percent using Eq 1:
12.2 Determine the lengths of DE and AE in chart units.
Calculate the elastic recovery in percent using Eq 2 (see Note 2):

NOTE 2—Percent of permanent deformation plus percent of elastic recovery = 100 %.
12.3 Determine the length of BE and GE in chart units. Calculate the stress retention in percent using Eq 3:

12.4 Read and record the force at point G in grams-force, lbs-force, or Newtons.
12.5 Calculate the average, standard deviation, and 95 % confidence limits of the average for each factor measured, including thickness, for each set of five specimens tested.
13 Report
13.1 Report the following information:
13.1.1 Complete sample identification,
13.1.2 Extensions tested,
13.1.3 Number of specimens tested,
13.1.4 Permanent deformation of each specimen and time if different than 180 s,
13.1.5 Elastic recovery of each specimen and time if different than 180 s,
13.1.6 Stress retention in both percentage and grams-force
or pounds-force and time if different in 60 s. (Stress retention can be reported as a plot of GE versus time),
13.1.7 Thickness of each specimen, and
13.1.8 Average results, standard deviations, and confidence limits where applicable.

Elastic Recovery and Stress Retention Tester for Stretch Films as per ASTM D5459 (500N capacity)
- Grips suitable for films of with 25.4mm
- Computer control
- Ball screw movement mechanism
- USB port to PC (computer is up to the customer)
- Software is included
- Report to MS SXCEL
- Automatic calculation according to ASTM D5459
- Limit switches for safety
- Maximum force capacity 500N
- Maximum travel with grips 450mm
- Grip separation at start of test 127mm

