WORDPRESS_PDF
4 Apparatus
4.1 Cold chamber, in which the test pieces are exposed to low temperature, sufficient in size to contain the bending fixture used for testing the test pieces and to permit the Operation of the fixture to bend the test piece without removal from the chamber. The cold chamber shall also have sufficient work space to permit the conditioning of test pieces as outlined in clause 7. lt shall be capable of maintaining a uniform atmosphere of cold air or any other suitable gas at specified temperatures to within a tolerance of +-1 C.
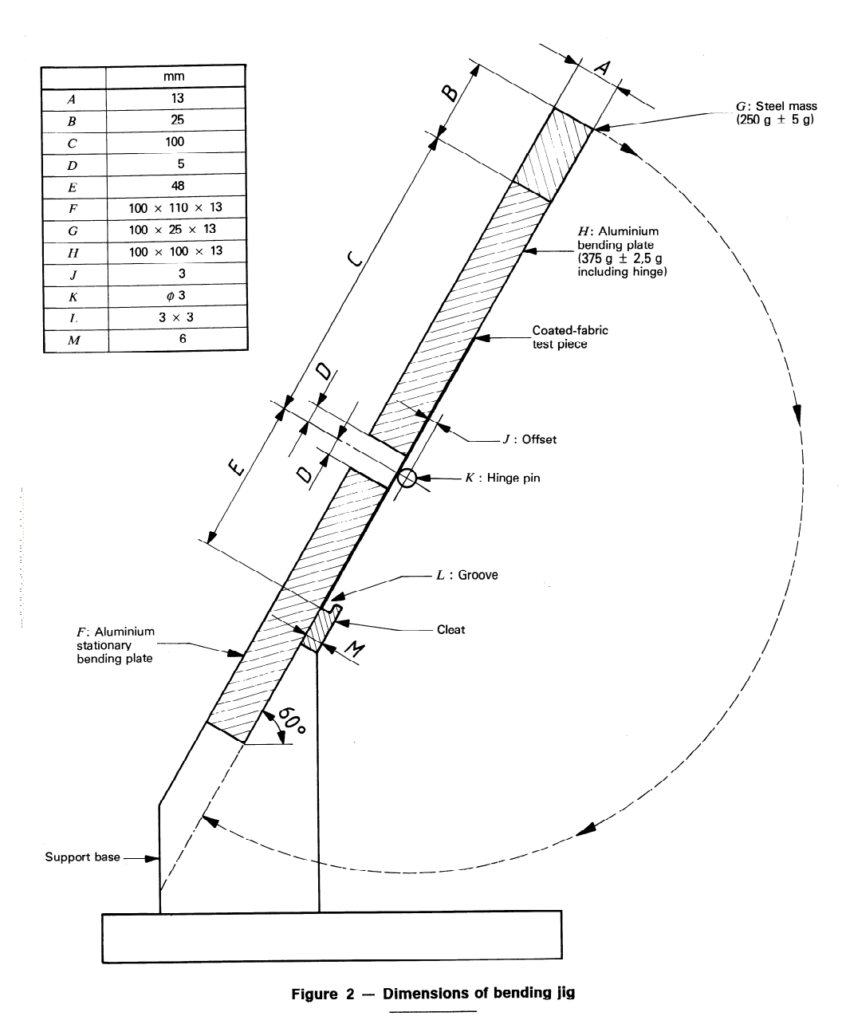
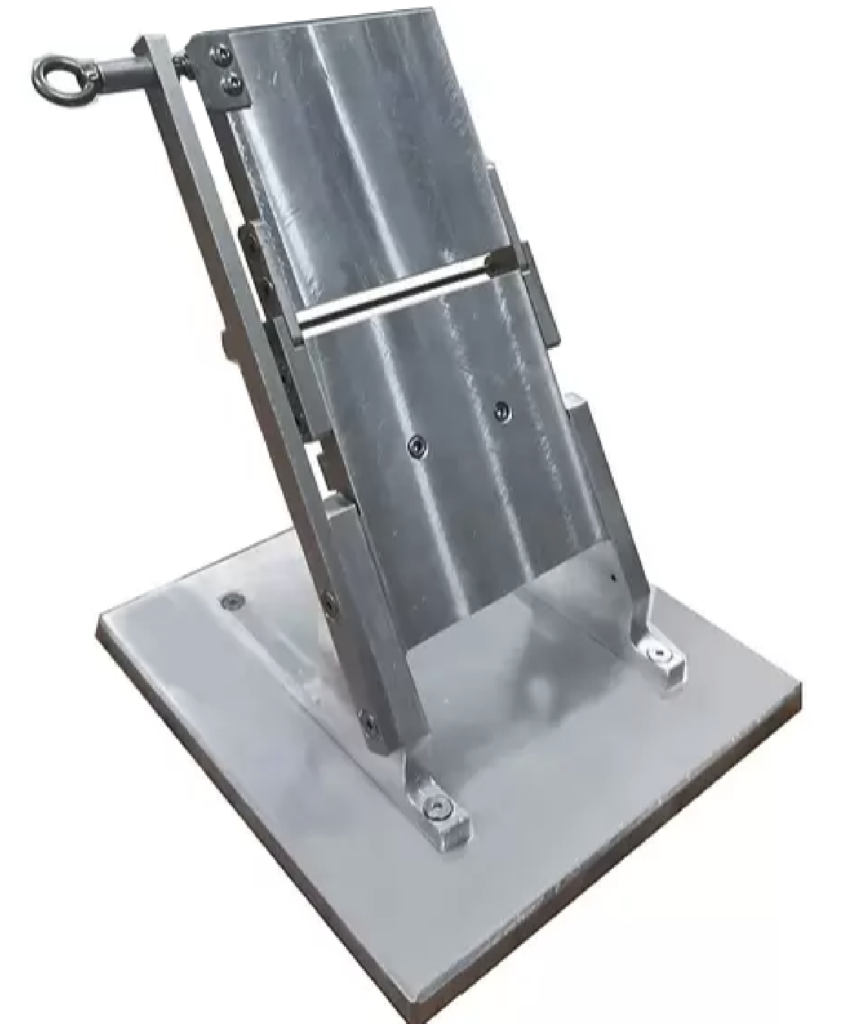
4.2 Bending jig, for bending the test pieces, as shown in figure1 and figure 2.
Masses, mass tolerances and dimensions shall be as specified in figure2.
4.3 Glass plates, of sufficient number, having dimensions of approximately 125 mm x 175 mm, for use when conditioning all test pieces.
The thickness of the glass plates shall be such as to permit easy handling.
4.4 Gloves, for handling test pieces within the cold chamber.
The gloves will be conditioned at the same temperature as the test pieces. A second pair of gloves at room temperature shall therefore be available for wearing within the cold gloves as protection for the operator.
5 Test pieces
Take three test pieces, each measuring 25 mm x 100 mm, equally spaced across the working width of the sample and with their lengths parallel to the longitudinal direction of the coated fabric, unless otherwise specified.
6 Time-interval between manufacture and testing
6.1 For all test purposes, the minimum time between manufacture and testing shall be 16 h.
6.2 For non-product tests, the maximum time between manufacture and testing shall be 4 weeks; for evaluations intended to be comparable, each test, as far as possible, shall be carried out after the same time-interval.
6.3 For product tests, whenever possible, the time between manufacturing and testing shall not exceed 3 months. In other cases, tests shall be made within 2 months of the date of receipt of the products by the customer.
7 Conditioning of test pieces
Immediately prior to testing, condition the test pieces in one of the standard atmospheres defined in ISO 2231.
8 Procedure
8.1 Measure the thickness of each test specimen in accordance with ISO 2286. Place the three conditioned test pieces between glass plates (4.3), with sufficient space between each test piece to permit the passage of air during the conditioning period. Place the glass plates with the test pieces held in position, the bending jig (4.2) and the cold gloves (4.4) in the cold chamber (4.1). Unless otherwise specified, expose them for 4 h to the specified test temperature.
8.2 At the termination of the exposure period and without taking them out of the test chamber, remove the test pieces from between the glass plates one at a time (CAUTION, see below) and place in the bending jig with the flexing plate held in the open position by the trigger pin. Unless otherwise specified, in the case of substrates coated on one side only, place the coated side away from the mandrel. In the case of double-coated fabrics, either or both surfaces may be evaluated unless otherwise specified.
CAUTION — Gloves must be worn at all times when handling test pieces prior to making the bend test.
When materials greater than 2,2 mm in thickness are to be tested, it may be necessary to increase the mass of the steel top bar G (see figure2) and increase the clearance between the back plate and mandrel to enable the specimen to be inserted. In this case, report the deviation in the test report.
8.3 As soon as the test piece is in position in the bending jig, release the trigger and permit the flexing plate to make a free fall.
8.4 After all the test pieces have been tested, remove them from the test chamber and examine each test piece for fractures or cracks in their coating under a magnification of x5. During the examination, fold all test pieces through 180° in the same direction as the bend made during the test.
9 Assessment of damage
9.1 Depth of crack
Grade the cracking, if any, according to the following five-part scale.
A — surface or finish crack not exposing the cellular layer, middle layer or substrate;
B — cracking into but not through the middle layer;
C — cracking through to the substrate or base fabric;
D — cracking completely through the material;
O — no cracking.
9.2 Number of cracks
Record the number of cracks of greatest severity, up to 10. If there are more than 10, record “over 10”.
9.3 Length of crack
Record the length, in millimetres, of the largest crack of greatest severity.


- According to ISO 4675
- Freezing chamber -20C is needed for test (it will be quoted separately)
- 3 pcs of glass plates dimensions 125*175mm
- 2 sets of safety gloves
- Aluminum stationary and bending plates
