
1- Placement
Place the machine in rugged stable table
2- Compressed air line
From the back panel of the machine, connect compressed air line

3- Using pneumatic lifter, bring up the elevator to see inside the bath. Be noted for bringing this up you dont need to connect power. Before filling the tank with silicone oil, dont make the power ON.
4- Fill the bath with silicone oil. Silicone oil with the lowest viscosity such ass grade 100 (some higher viscosities are also possible) or equivalent oil is suitable. Open the cap for oil bath, fill it with oil. Use oil indicator rod to check the minimum-maximum level of the oil. In oil indicator rod there are two markings for minimum and maximum oil level.
Be noted that silicone oil will be expanded when heated up. 10lit of oil will be enough for covering the sample pieces and heating elements. After filling of the oil , also can be check visually that the oil covered the heating elements inside the bath. Figure below shows 3 marks. Oil level need to be between marks 1 and 2.


5- Connect hoses for cooling water in the back panel. Drain valve is for emptying the bath from oil in case of need.
6- Connect main electricity. It is 220V-50Hz single phase. Power consumption of the machine is less than 3KW.
7- Connect USB cable to computer. Windows versions of XP, 7, 8, 10 is proper. Cable and software flash disk is coming to you with machine. Be noted that flash disk is also hardware lock for the software. Missing the flash disk, you need to buy another one from sales. When using software, flash disk need to be connected to PC, unless you will get “hardware lock” message.

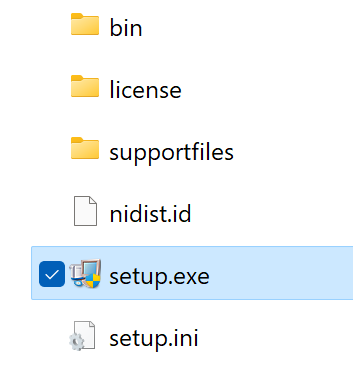
8- Install the software. Flash disk includes two folders for software. Inside “My installer” you will find installation files. during installation dont change default root for installation.

Inside “My Installer”. Run the “setup.exe”.
9- You need also to install the driver for communication. Download the driver and install as per below guide:
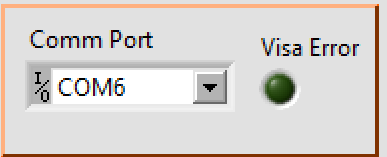
10- After installation and setting correct port number in Device manager, software is connected to machine and ready to work. check the port number of the software on “setting” tab, and set the same number for the virtual port in device manager as per above link.
11- If the windows version is 64 bit, installation will be done on the root of: “C:\Program Files (x86)\Vicat_HDT\”. for not recieving the hardware lock message when running the software, you need to copy whole folder of “Vicat_HDT” to the root of “C:\Program Files\Vicat_HDT\” as well.
After installation of software in some versions of Windows need to open security of .dat file for (data file for saving calibration info of the software). For this you need to do as below:
Right click on installation folder in “”C:\Program Files (x86)\Vicat_HDT” and choose “properties”

Go to security tab and choose users:

Click on :

Again select “users” and click on “Full control” like below figure:

There is also “.dat” file for saving calibration data and panel data when you are quitting the software. The file is in Root of drive “C” named “Vicat.dat”. Also do the above security access to that file as well like above procedure.
12- Run the software, screen is like below:

You have 5 tabs for setting test parameters, stations and setting. If the communication is OK, you will see green led on top right corner of the panel.
In parameter page, you have entering of general sample parameters and two main parameter of temperature and temperature increase rate.

In each of stations page, you have graphical display of temperature, time, displacement. You have cursers section. here you can add any number of cursors to the graph and read cursers data.

right click on cursers section and you have full options of adding new cursors or changing properties of all cursors.

when you move any cursor on the graph using arrow keys you can change the snap of that cursor to the temperature graph or displacement graph and will read the value in front of the cursor.
Moving the cursor to requested point:
Move the mouse to the vertical hatched line of the cursor like above picture, hold down mouse left key and you can move the cursor to the requested point on graph. when moving the cursor you can see the cursor point data below the graph like below picture:
X: is the time data of cursor
Y: is the value of the graph. depending on that the cursor is snapped on “displacement” or “temperature” then Y is showing that value.
in any point on graph you can switch the cursor between “displacement” and “temperature” using the arrow keys below the graph like below:

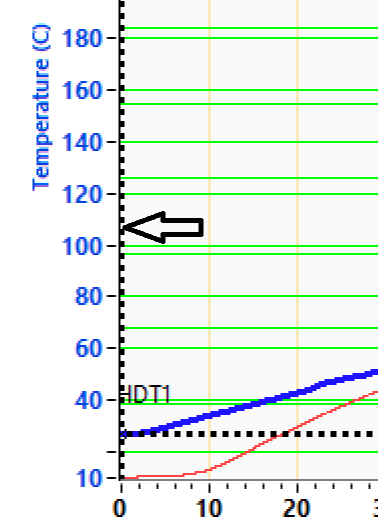
Clicking on “up” or “down” arrow key will snap the cursor to temperature or displacement graph and showing the value on cursor data below the graph. For example in measurement of Vicat value, move the cursor to the displacement of 1mm and using up or down arrow key switch between displacement and temperature, in this way you will have the value of temperature for definite displacement of 1mm.
In “setting” tab you have section for calibration of displacement of sensors.
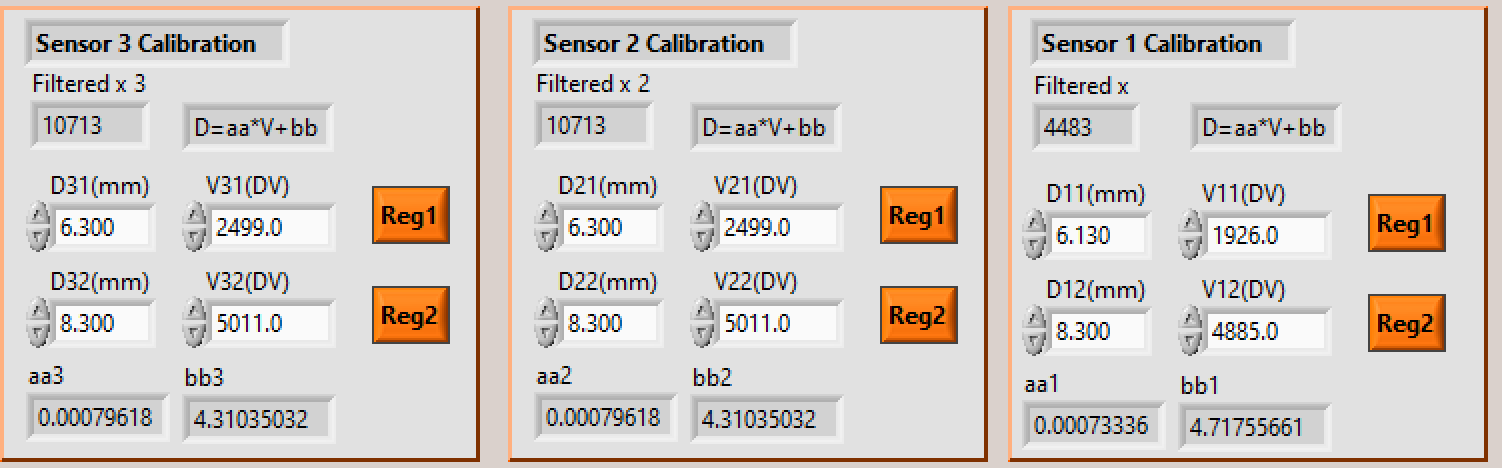
for calibration, you have two gages of plexi with two different thickness. just put the specific gage under sensor, move sensor to the top of that gage, Enter the real thickness value of the gage that is measured using caliper, enter the value on positions of D21(mm) and D22(mm) for example for sensor 2 and after putting that specific gage under the sensor click on Reg1 and Reg2. This is two point calibration. Meaning first put thicker plexi gage under sensor, bring the sensor to the top of the plexi gage so that touches it and the , Enter the value of thickness in “D22(mm)”, then click Reg2. Do the same process for plexi gage 1. After this process, the displacement sensor will be calibrated and ready to use.
Other parameters in setting tab is related to technician not to operator.
Other parameters of the screen will be seen in all tabs.

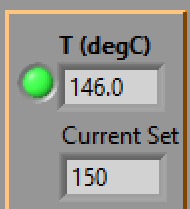
T(degC): showing current temperature of the silicone oil.
Current set: It is control current set parameters for controlling the temperature increase rate as per standard.
Run: it is indicator of the status of the software showing software is in Run mode or not.
Disp1,2,3(mm): Showing current value of each sensor.
Cooler: It is for opening the vale for cooling water
dz1,2,3: When start running the process, current values of each sensor will be save as zero point of that sensor and graph will be displaced based on that zero point.
Report: for reporting you need to have Microsoft Word on you computer. MS office versions of up to 2016 is working properly.
Clicking the “REPORT” will open the report of the test on a MS WORD file like below:
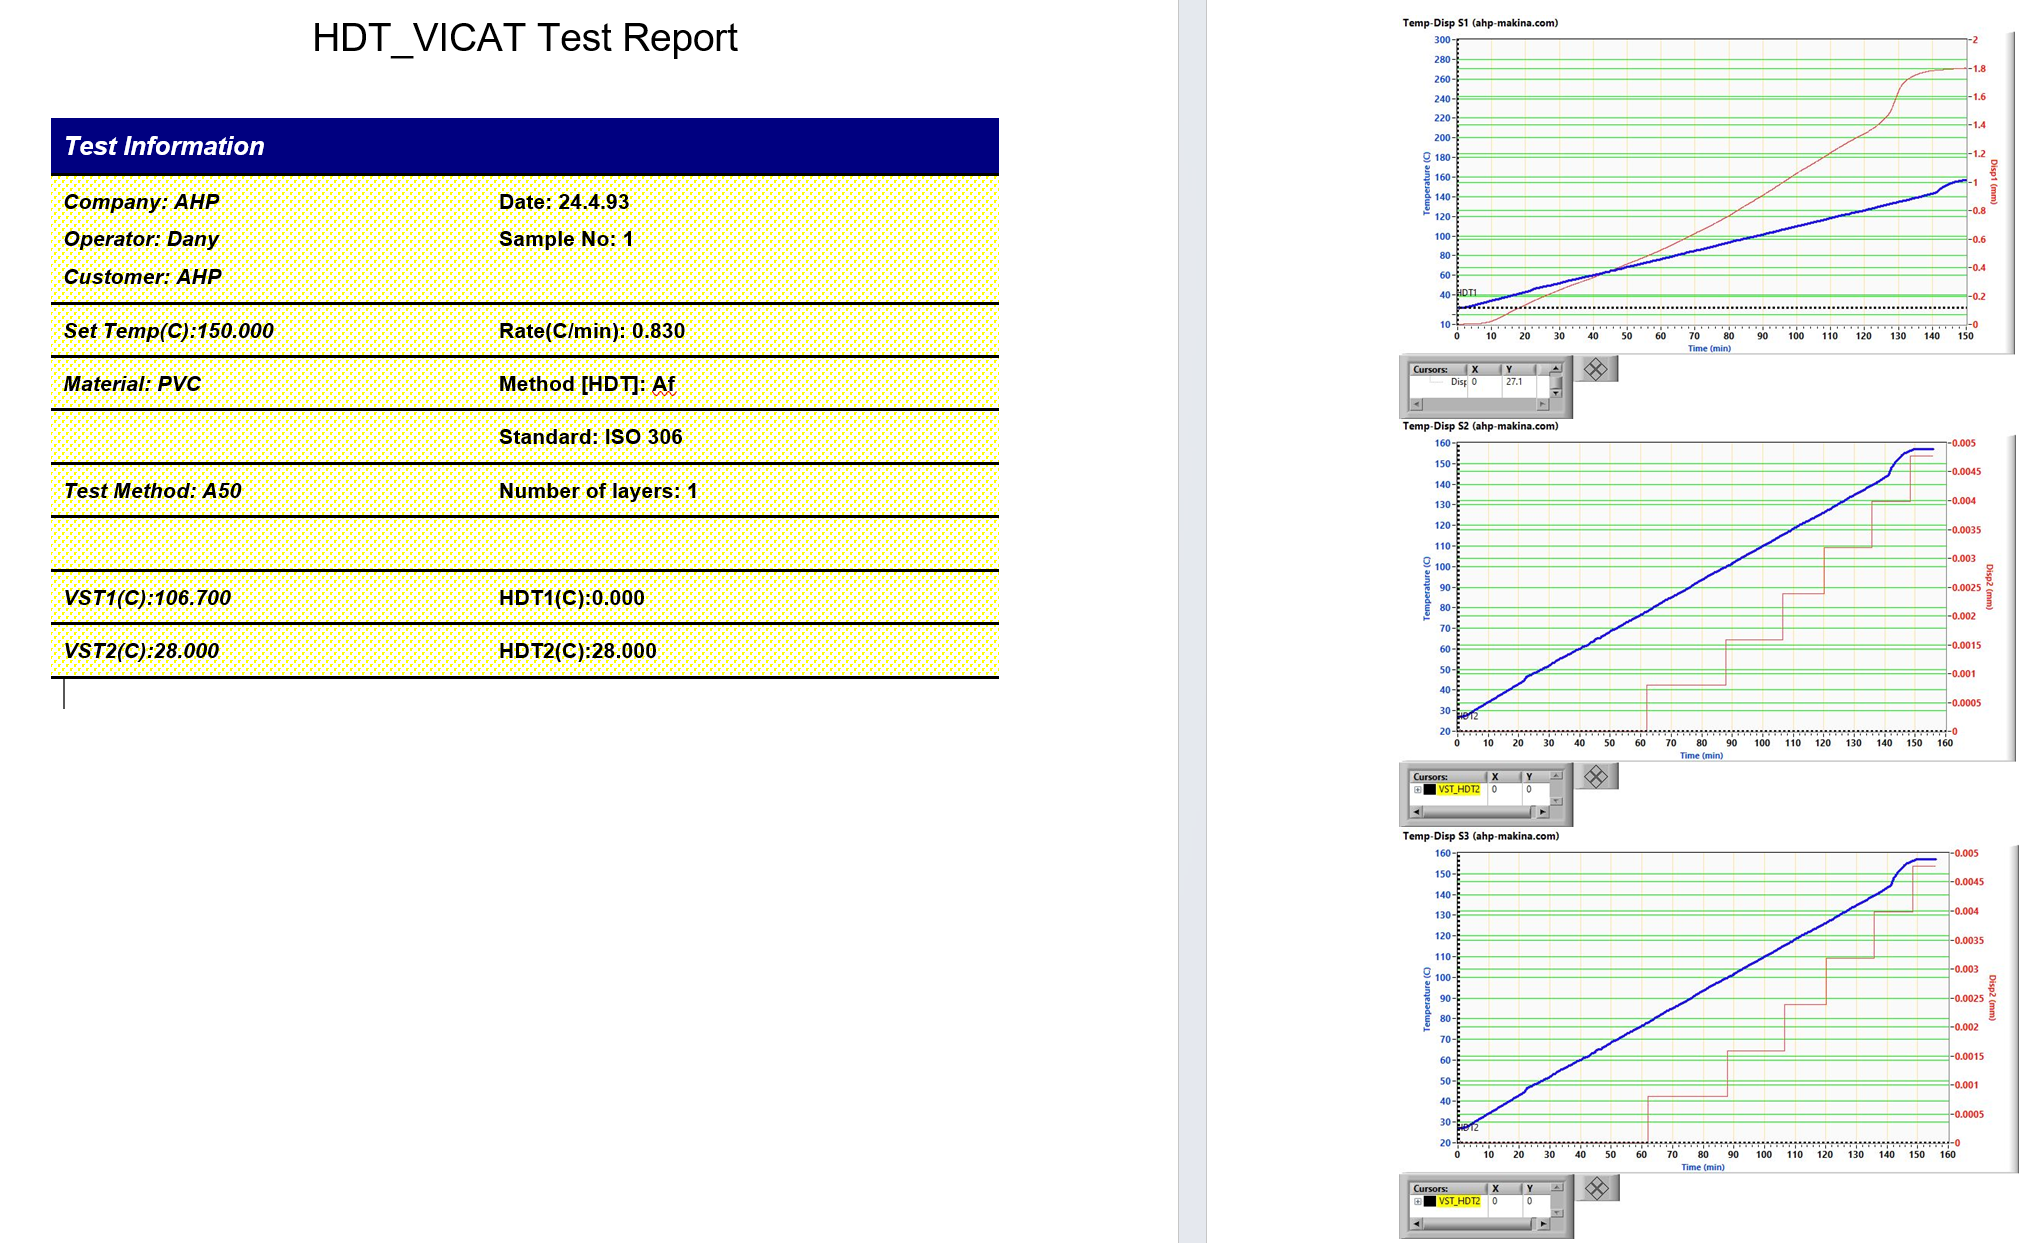
Report includes a table for general sample parameters and 3 graphs of displacement-temperature-time for 3 stations.
Quit: Before turning power off , click Quit key to reset the controller.
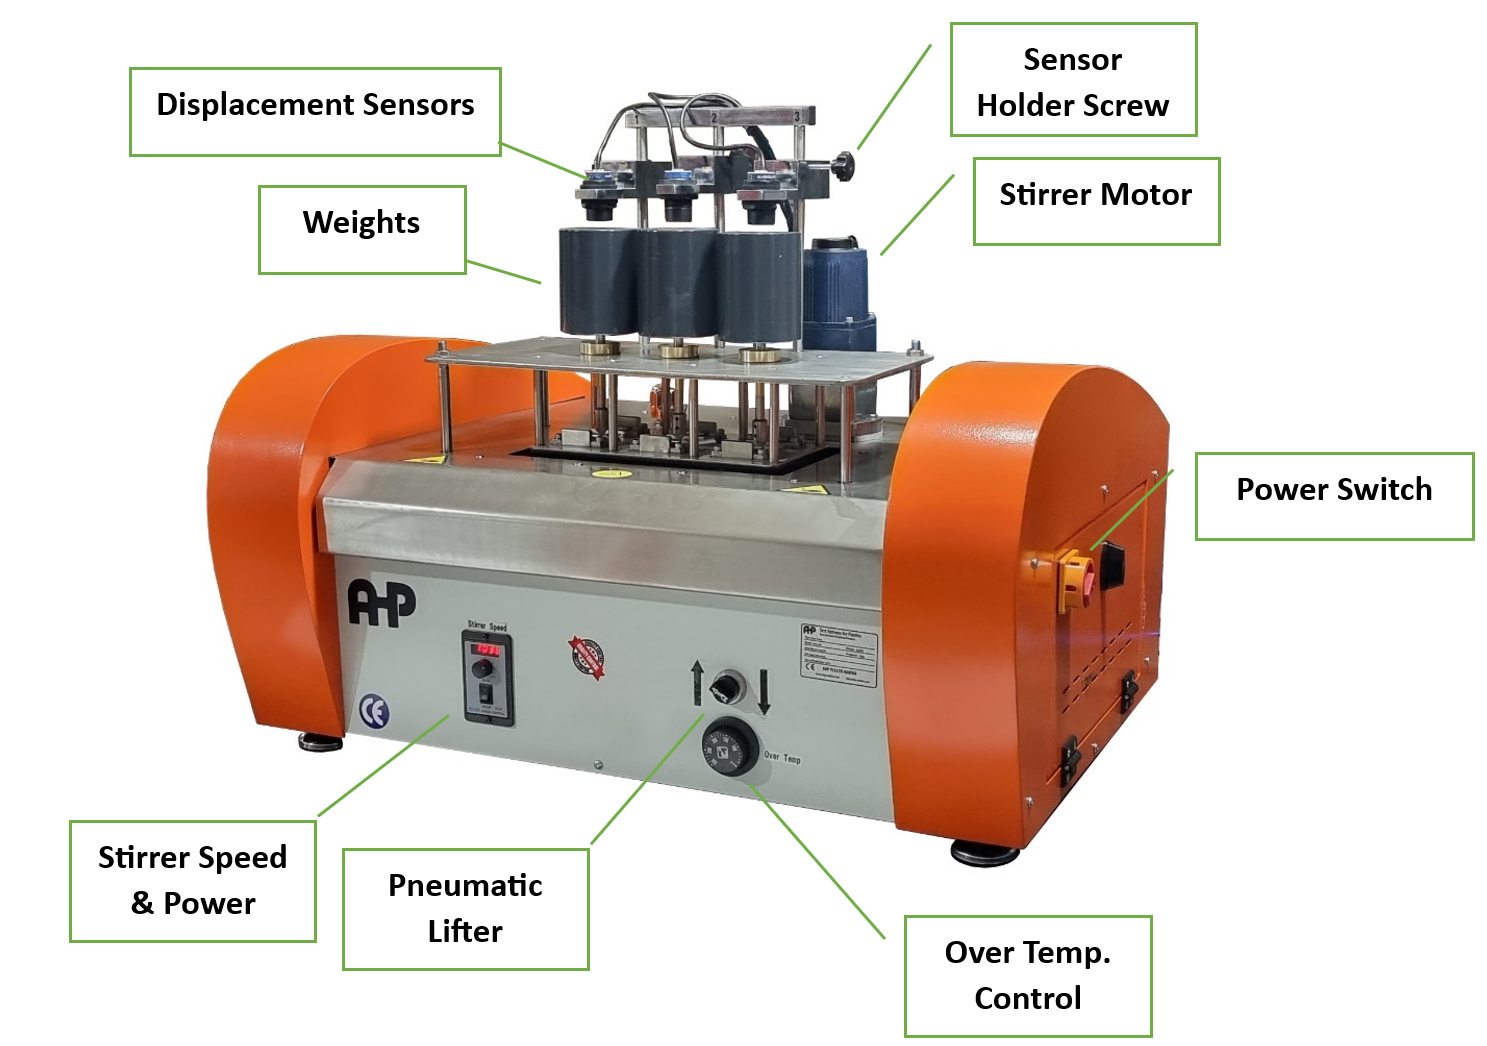
13- Prepare the sample as per standard and put in place.
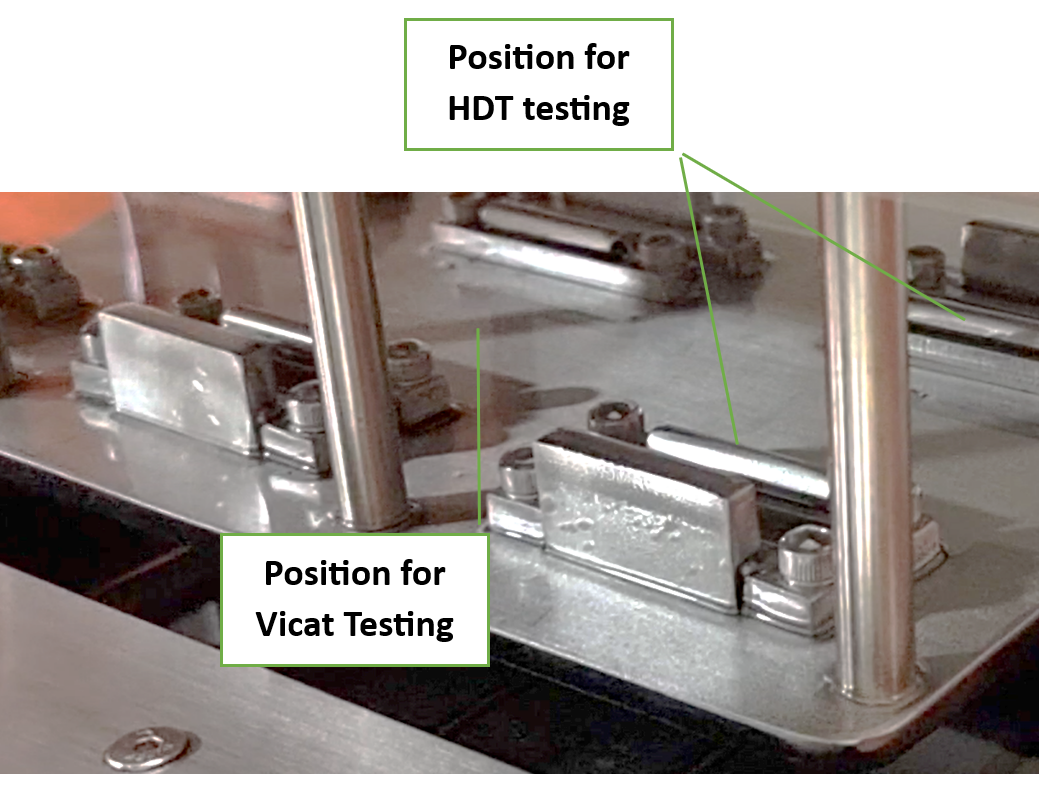
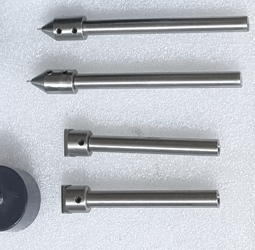
There are two type of test rods. Vicat and HDT. Body of the rod and the head. Head can be opened by two set screws and separated from the rod.
Note: Needle for vicat tester need to be fully backed up by main rod, unless it will slide during test and you will wrong data for displacement of needle into the sample material.
Open the head first then put the rod inside brass guide. Then attach the head of rod and tighten the two set screws from the bottom side. Then put the sample piece under the rod. Using pneumatic elevator, take the sample tray down. Then put proper weight on test rod.

14- Loosen the holder screw and bring sensor down to touch the plexi gage that you put on weight. Do the process of calibration as per above guide. First put the thicker plexi gage then put thinner plexi gage. Set the temperate and increase rate. After calibration of sensor done, you can click on Start.
15- After reaching the set temperature, you can stop the test.
16- Now you have graph for displacement and temperature. As per standard method check what is the requested displacement, bring the cursor to that specific displacement as per norm and using arrow keys attach the snap to the temperature graph to see the equivalent temperature of that specific displacement. Put the value of temperature in HDT or Vicat field to have them in report.
17- For any online support, please have one the remote distance connection software like Supremo, Anydesk, TeamViewer on you computer and contact our WhatsApp line as : +905469180483
18- Also there is training video in our YouTube channel.
19- To know standard test method please follow below link: